
There is a unique kind of joy in serving a home-cooked meal to your family. You’ve spent the afternoon prepping fresh vegetables and marinating chicken breasts in lemon and herbs, envisioning a healthy, protein-rich dinner that everyone will love. But as the chicken sizzles in the pan or roasts in the oven, a familiar anxiety creeps in: Is it actually done?
For many home cooks, the “moment of truth” involves a kitchen knife. We poke a small slit into the thickest part of the meat to see if the juices run clear or if the center is still pink. While this gives you an answer, it comes at a high price. That small cut acts like a puncture in a water balloon, allowing all the precious, flavorful juices to spill out onto the pan. By the time the chicken hits the dinner plate, it’s dry, stringy, and toughthe dreaded “overcooked” disaster.
If you are tired of choosing between “potentially unsafe” and “cardboard-dry,” it’s time to change your approach. Here is how you can achieve perfectly cooked, succulent chicken every single time without ever cutting it open.
The Home Cook’s Dilemma: Safety vs. Texture
As a parent or a home cook, your priority is the health of your loved ones. We all know the risks of undercooked poultry, so our instinct is to “cook it a little longer just to be safe.” However, chicken, especially lean breast meat, has a very narrow window of perfection.
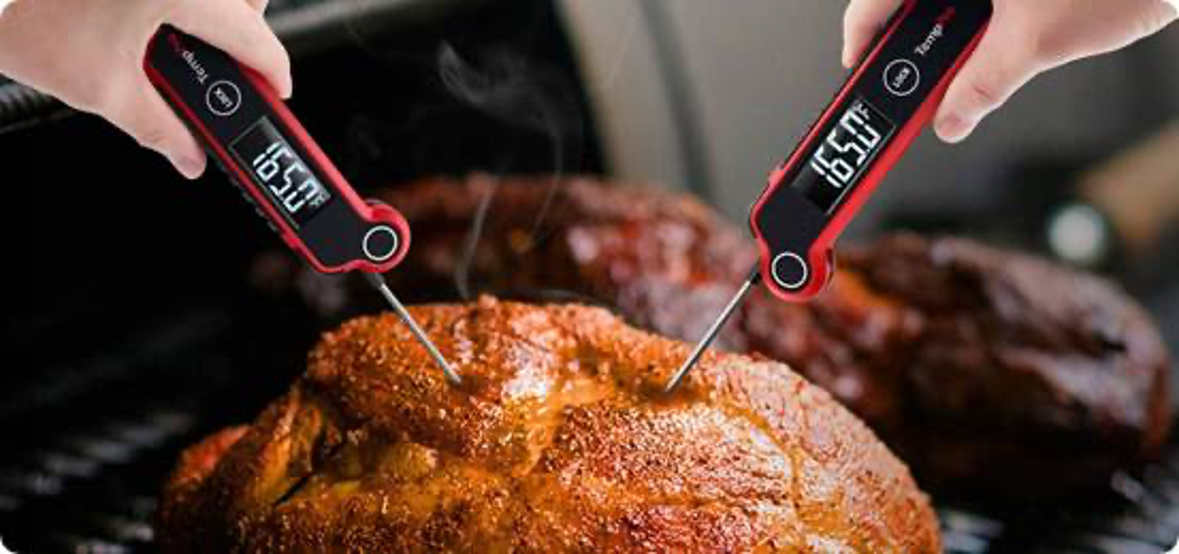
The USDA recommends an internal temperature of 165°F (74°C) for poultry. Once you hit that number, the bacteria are destroyed. But if you wait until 175°F or 180°F because you were “eyeballing it,” the proteins tighten up and squeeze out all moisture. To cook like a pro, you need to stop guessing and start measuring.
Why Cutting It Open Is Ruining Your Dinner
When chicken cooks, the heat causes the muscle fibers to contract, pushing the juices toward the center. If you let the meat rest after cooking, those juices redistribute, resulting in a tender bite. When you cut the meat open while it’s cooking to check the color, you break the “seal”.
Not only does this make the meat dry, but “visual checks” are also notoriously unreliable. Sometimes chicken near the bone can still look slightly pink even when it’s safely cooked, and conversely, white meat can look “done” while the internal temperature is still in the danger zone.
How to Cook Chicken Just Right
The only way to guarantee a juicy, fully cooked bird without losing a single drop of juice is to use a high-quality Instant-Read Thermometer.
Instead of a wide gash from a knife, a food thermometer uses a tiny, needle-thin probe. It enters the meat, senses the temperature at the very tip, and gives you a digital reading in seconds. It’s the difference between guessing the weather by looking out the window and using a precision barometer.
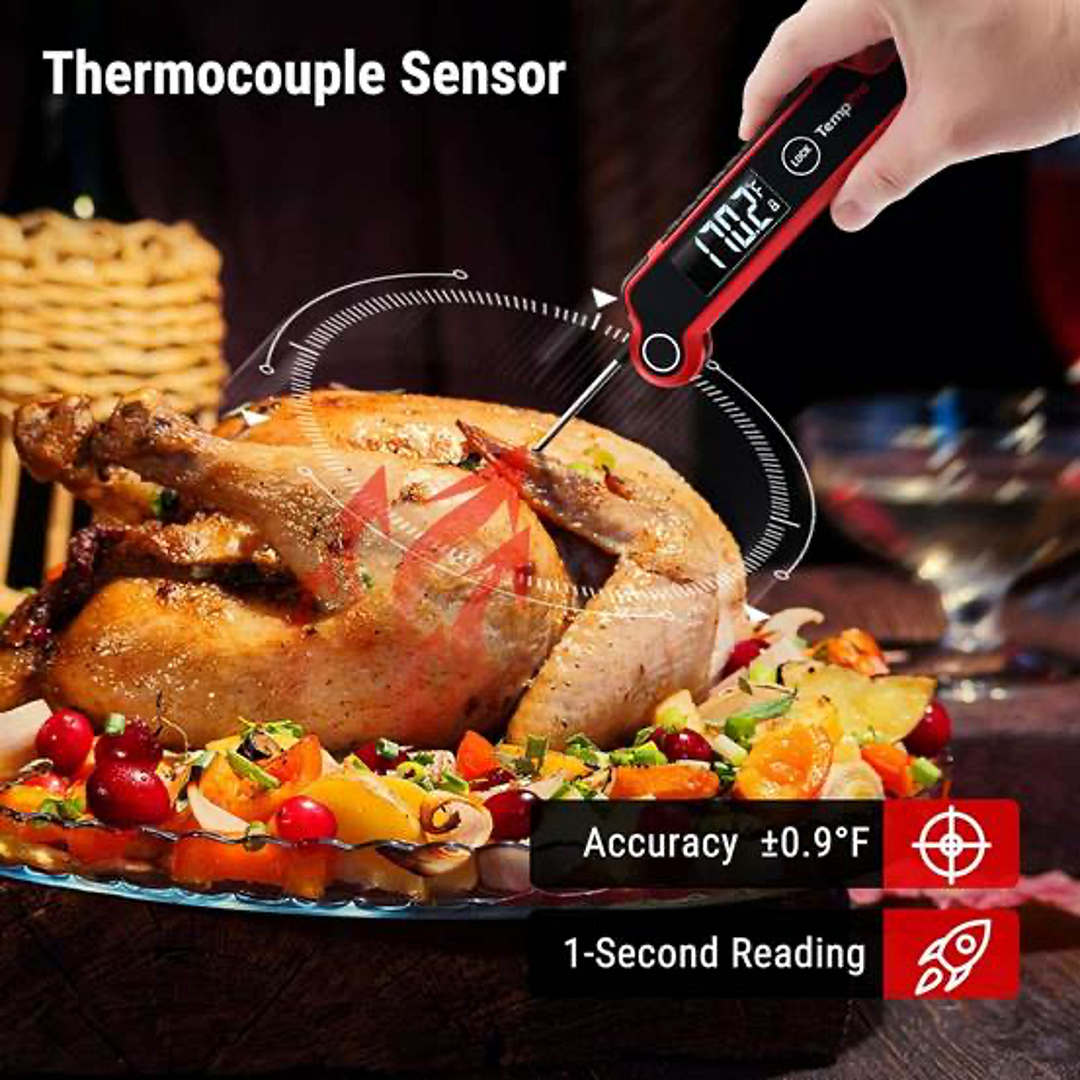
For the home cook who values both time and quality, we recommend the TempPro (former: ThermoPro) TP620 Digital Instant-Read Meat Thermometer. It is designed specifically to take the stress out of the kitchen and put the joy back into your family meals.
It’s a professional-grade tool tailored for the home environment. Here is why it’s a game-changer for your chicken dinners:
l Lightning-Fast Speed: It delivers an accurate reading in 1 second. When you’re leaning over a hot stove or a steaming grill, every second counts.
l High Accuracy: With an accuracy of ±0.9°F, you can trust that when it says 165°F, your chicken is perfectly safe and perfectly juicy.
l Motion-Sensing Sleep/Wake: We’ve all been there – your hands are messy, and you forget to turn the tool off. The TempPro TP620 automatically turns off when folded and wakes up the moment you pick it up.
l 180° Foldable Probe: Whether you are left-handed or right-handed, or trying to reach a chicken in the back of a crowded oven, the rotating probe makes it easy to see the display.
l Large Backlit Display: No more squinting! The bright, clear numbers are easy to read even in low-light backyard BBQ settings.
l IP65 Waterproofing: Kitchens are messy. If you splash a little sauce or water on it, simply rinse it under the tap without worry.
Step-by-Step: How to Measure Chicken Perfectly with the TP620
Using the TempPro TP620 is incredibly simple. Follow these steps to ensure your next meal is a success:
1. Identify the Thickest Part:
For a chicken breast, this is usually the center. For a whole bird, it’s the thickest part of the thigh (avoiding the bone, as bone conducts heat differently than meat).
2. Insert the Probe:
Unfold the TP620 probe to turn it on. Insert the tip about 1 to 2 inches into the thickest area.
3. Wait for the Flash:
The reading on the large LCD screen will quickly appears.
4. The “Pull” Temperature:
Here is a pro tip: chicken temperature will continue to rise slightly after you take it off the heat which is called carryover cooking. Aim to “pull” your chicken off the stove when the TempPro TP620 reads 162°F-163°F.
5. Rest and Reach 165°F:
Place the chicken on a plate and let it rest for 5 minutes. The temperature will naturally climb to the safe 165°F mark while the juices settle back into the fibers.
Conclusion
Your family’s health is too important to leave to guesswork, and your hard work in the kitchen deserves a delicious result. By moving away from the “cut and peek” method and embracing the precision of the TempPro TP620 Digital Instant-Read Meat Thermometer, you are investing in better health, better flavor, and a much more relaxed cooking experience.
Stop cutting the life out of your chicken. Use an instant-read thermometer, hit that golden 165°F mark, and enjoy the praise of a family who finally knows just how good your cooking can truly be.