Most conversations about AI photo editing in 2026 center on capability lists and model benchmarks. Editors are compared by how many features they offer, how many models they integrate, and how fast they process. These comparisons are useful but incomplete. They describe what a platform can do without describing what it feels like to use it. And what it feels like to use an AI editor—the texture of the experience, the rhythm of the workflow, the moments of surprise and frustration—determines whether someone will reach for it again tomorrow.
I set out to document the actual experience of editing photos by describing changes in plain language. Over several testing sessions, I uploaded a range of images—portraits, product shots, landscapes, and casual snapshots—and attempted the kinds of edits that real users perform daily. I tracked what happened on first attempts, what required regeneration, where the AI interpreted my intent accurately, and where it missed. The goal was not to produce a feature comparison but to capture the experiential truth of language-directed editing: what works, what does not, and what the learning curve actually looks like.
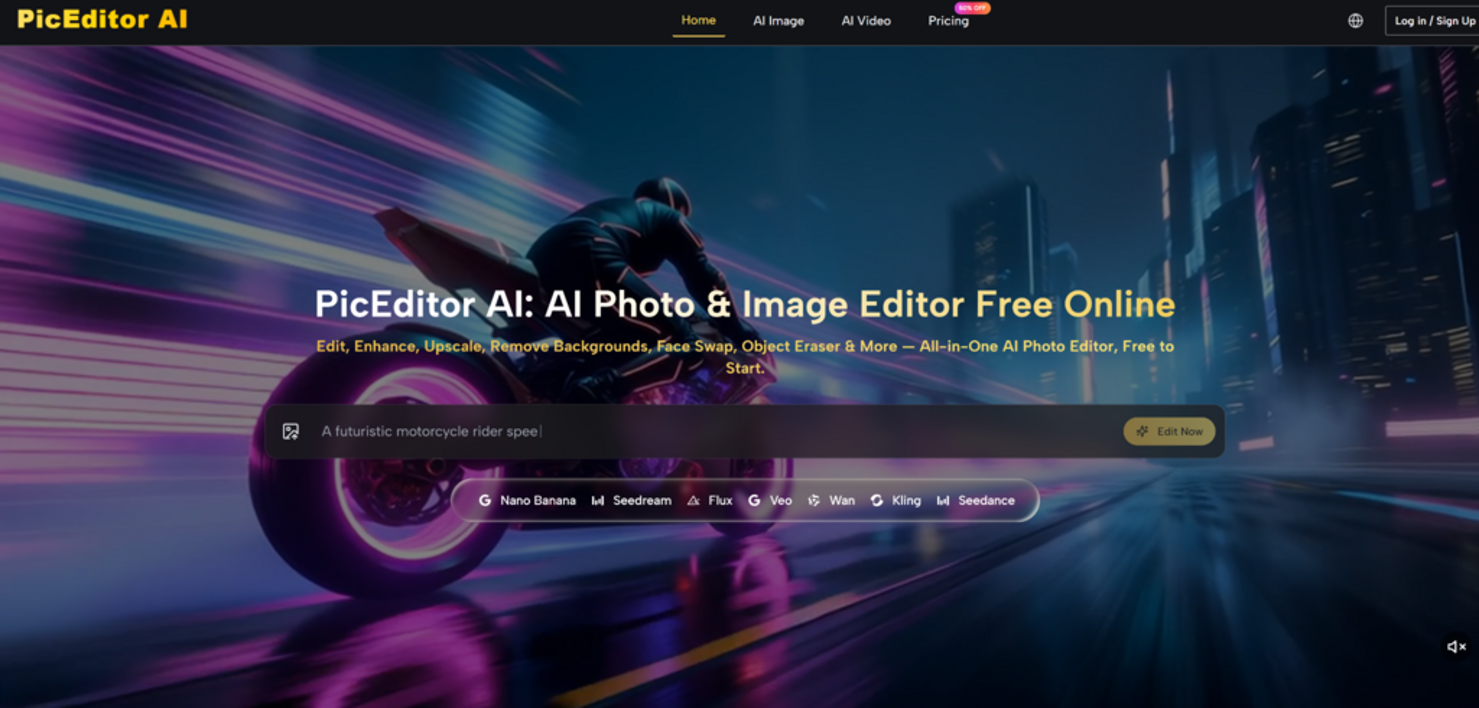
This review centers on an AI Photo Editor that structures its workflow around natural language descriptions rather than manual controls. The platform integrates enhancement, background removal, object erasure, style transfer, face swap, and photo-to-video animation within a single browser-based workspace. Each editing function is accessed through the same fundamental sequence: upload, select a tool, describe the change, and review the output. What follows is a record of what happened when I put that sequence through its paces.
The Testing Protocol and What I Measured
I designed the test sessions around three image categories that represent distinct editing challenges. The first category was portraits—images where skin texture, facial detail, and lighting subtlety matter. The second was product photography—ceramic tableware with speckled glaze patterns, leather accessories with visible stitching, and glass bottles with transparent and reflective surfaces. The third was landscape and scene photography—images with complex compositions where style transfer and creative transformations would be tested.
For each image, I attempted at least two editing types: enhancement and either background removal, object erasure, or style transfer. I documented whether the first result was usable, how many regeneration attempts were needed, whether detail fidelity held up across editing stages, and how clearly I needed to describe each change to get the intended result. I did not measure speed in seconds because browser-based tools are inherently variable. I focused on editing accuracy, consistency, and the cognitive experience of describing visual changes in words.
Scene-by-Scene Results Across Different Image Types
Portrait Enhancement and the Skin Texture Challenge
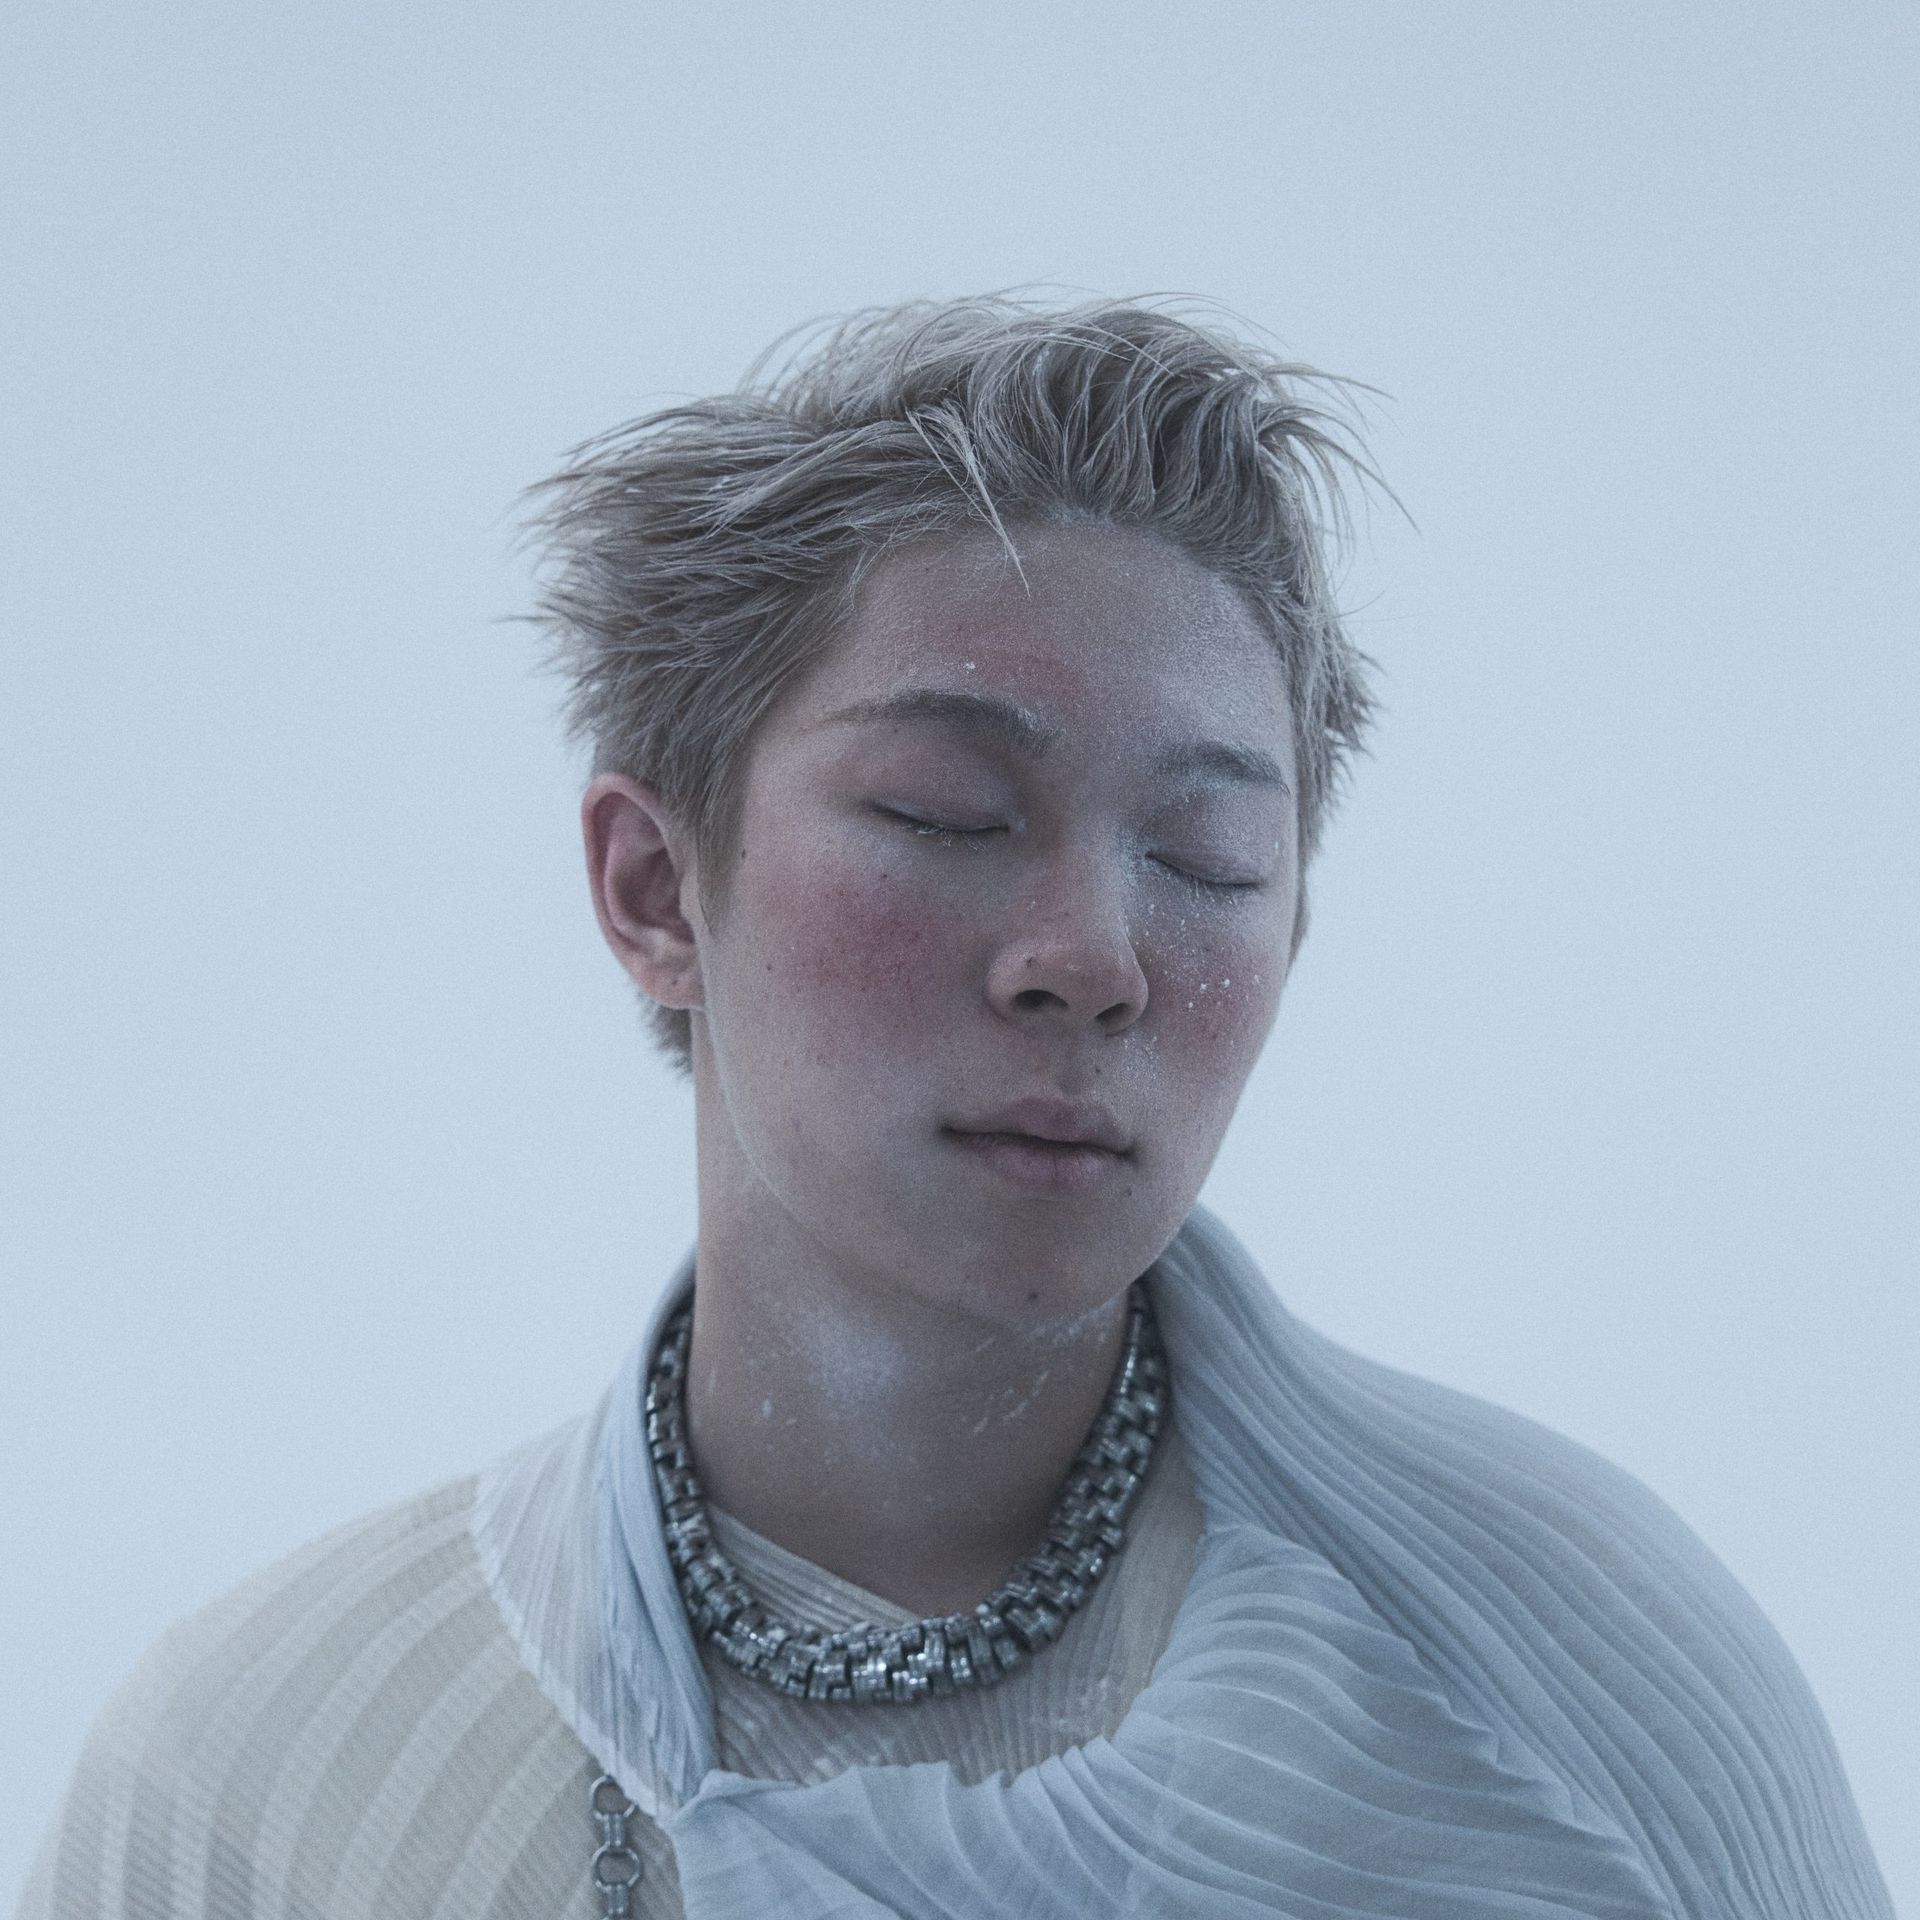
Portrait editing tests an AI editor’s ability to distinguish between texture that should be preserved and imperfections that should be smoothed. Over-aggressive enhancement produces plastic-looking skin. Under-aggressive enhancement leaves the image looking unprocessed. The sweet spot preserves pore detail, fine hair, and natural skin variation while reducing noise and evening out exposure.
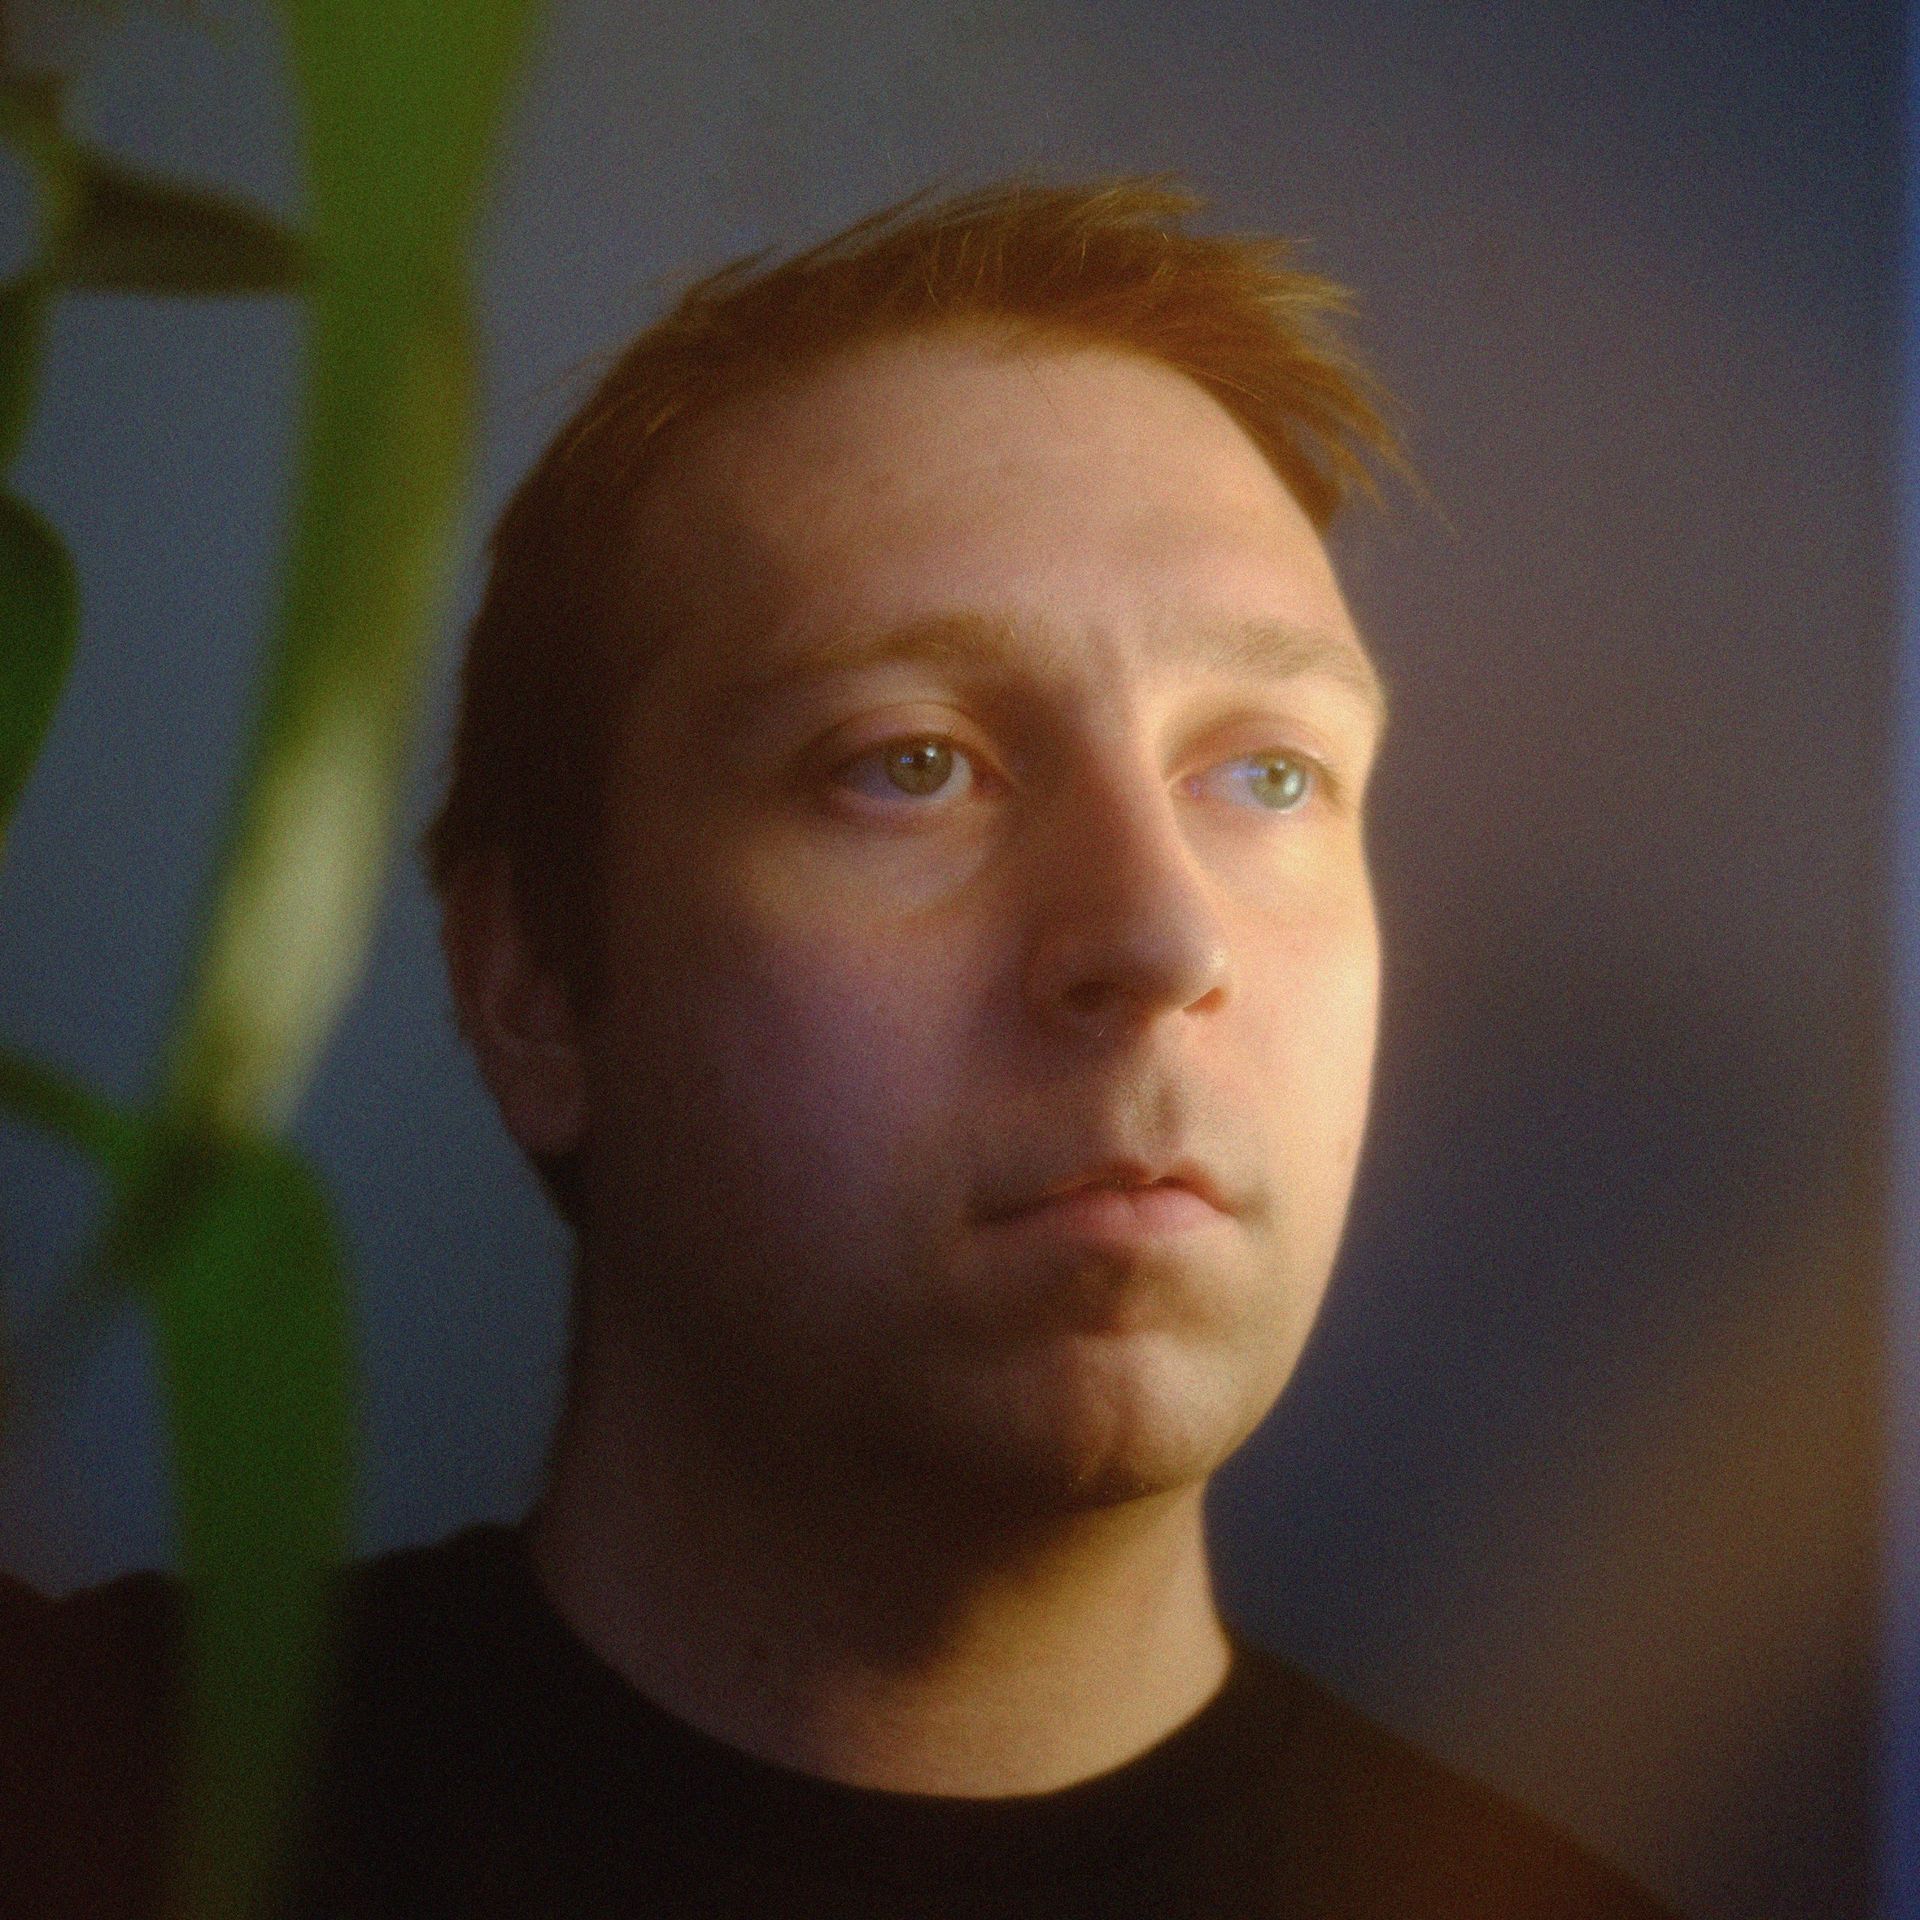
I uploaded a portrait with mixed indoor lighting—one side of the face in soft window light, the other in deeper shadow. The enhancement prompt was: “Brighten the shadow side of the face to match the lit side while keeping skin texture natural and unretouched.” The first result lifted the shadow exposure without flattening the skin. Pores and fine lines on the shadow side remained visible at full zoom rather than being smoothed into a uniform surface. The transition between the brightened shadow and the naturally lit side appeared gradual rather than creating a visible editing seam.
When I tested a more demanding prompt—”Smooth the skin under the eyes slightly but keep the texture everywhere else unchanged”—the results were less consistent. The AI sometimes applied the smoothing more broadly than specified, affecting cheek texture as well. After two regeneration attempts with refined phrasing, I obtained a result that confined the adjustment to the under-eye area. The takeaway is that localized edits requiring precise spatial boundaries are harder to describe in words than global adjustments. The platform handles “brighten the whole shadow side” more reliably than “brighten only this specific region.”
Product Photography and Background Removal Precision
Product images demand clean subject isolation. E-commerce platforms penalize listings where background remnants appear around product edges. The test involved three product types with escalating difficulty: an opaque ceramic mug with well-defined edges, a leather wallet with fine stitching detail, and an amber glass bottle with semi-transparent walls and a colored liquid inside.
The ceramic mug separated cleanly on the first attempt. When placed on a pure white background at 200% zoom, no visible halo or edge artifact appeared around the mug silhouette. The leather wallet also separated well, with stitching threads preserved along the edges. Where the test grew more demanding was with the glass bottle. The background removal handled the solid portions of the bottle correctly—the amber glass and the label area separated cleanly. At the neck, where clear glass met colored liquid, the algorithm preserved a realistic transition without cutting into the bottle outline. However, when I placed the isolated bottle onto a dark gray background, a faint remnant of the original white background remained visible around one shoulder area at high zoom.
A second regeneration pass reduced but did not fully eliminate this residual edge. For marketplace listings where the product occupies most of the frame at standard viewing distances, this artifact would likely go unnoticed. For premium brand imagery destined for a hero banner or print catalog, manual touch-up in a traditional editor might still be necessary. The platform handles complex transparent objects competently but does not guarantee pixel-perfect isolation on the first attempt for challenging glassware.
Object Erasure and the Limits of AI Fill
The object eraser was tested on three scenarios: removing a power outlet from a wall behind a desk setup, removing a passerby from a street scene where they partially overlapped with a building edge, and removing a watermark from a sky area. These three scenarios represent small isolated distraction, medium object with edge overlap, and subtle pattern removal against a gradient background.
The power outlet removal succeeded on the first pass. The AI filled the gap with a plausible continuation of the wall texture—paint grain, subtle shadow variation, and baseboard alignment all appeared consistent. At normal viewing distance, the edit was undetectable. The street scene passerby removal was more challenging. The person overlapped with a building corner, and the AI needed to reconstruct both the building edge and the sidewalk texture behind the figure. The first result produced a slightly smudged building corner where the reconstruction did not perfectly continue the architectural line. A second attempt with a more specific prompt—”Remove the person on the left and reconstruct the building corner and sidewalk with consistent texture”—produced a cleaner result, though a careful observer could still detect slight texture repetition in the filled area.
The watermark removal against a gradient sky was the easiest scenario. The AI filled the removed area with a smooth gradient that matched the surrounding sky tones without visible seams. This type of edit—removing a small element from a relatively uniform background—appears to be the eraser’s strongest use case.
Style Transfer and the Gap Between Expectation and Output
Style transfer converts photographs into artistic renditions. I tested this on a landscape photograph of a canyon at golden hour—layered rock formations, warm sandstone tones, and atmospheric haze near the horizon. I applied three style presets through natural language prompts: oil painting, digital illustration, and cinematic treatment.
The oil painting preset reinterpreted the rock layers as visible brush strokes while preserving the ridgeline silhouette. Sandstone tones were amplified into ochre and amber hues, and the sky gained a textured, canvas-like grain. The geological stratification remained readable through the painted surface—individual rock layers were still traceable. The digital illustration preset simplified the rock faces into cleaner shapes with defined outlines and a slightly flattened color palette, producing an output that felt like concept art. The cinematic preset added dramatic lighting shifts, deepening the golden hour warmth into a film-like color grade with teal shadows and a subtle vignette.
The limitation that emerged across all style transfers was fixed intensity. When I wanted a subtler oil painting look—perhaps thirty percent stylization rather than one hundred percent—I had to experiment with prompt phrasing like “light oil painting style, keep original photographic texture visible.” The AI interpreted these instructions inconsistently across regenerations. Sometimes it delivered the subtlety I intended. Other times it produced results nearly identical to the full-intensity preset. Without a slider to control effect strength, hitting a precise middle ground requires trial and error.
This matters for commercial work where a client requests “just a hint of illustration style.” For personal creative exploration, where the goal is discovery rather than specification matching, the fixed intensity is less constraining. The outputs were consistently attractive—just not consistently adjustable.
Face Swap and the Lighting Consistency Requirement
The face swap tool replaces a face in one image with a face from another. Realistic results depend heavily on lighting consistency between source and target images. I tested two scenarios: a well-matched pair where both source and target faces were lit from the front at similar angles, and a mismatched pair where the source face was lit from above while the target body was backlit.
The well-matched pair produced a convincing result on the first attempt. Skin tones blended naturally, and facial features carried over without obvious compositing seams. Freckles and subtle shadow transitions on the source face appeared on the target body with appropriate adaptation to the target image’s overall exposure level. The mismatched pair revealed the tool’s dependency on lighting alignment. The front-lit face placed onto the backlit body appeared unnaturally bright, creating a visible disconnect that the AI could not fully reconcile. The tool performed its specific function—face replacement—competently, but did not extend to full-scene lighting harmonization.
From a practical user perspective, users planning face swap edits should select source and target images with similar lighting direction and quality. The tool handles the face geometry and skin blending well when lighting conditions align. When they diverge significantly, the result will look composited rather than natural, and no amount of regeneration within the current tool will fully resolve the lighting mismatch.
Photo-to-Video Animation as a Creative Extension
The photo-to-video feature adds motion to static images through preset animation types: slow zooms, parallax effects, and flowing element animations. I applied the slow forward zoom to the canyon landscape and received a short video clip where the camera appeared to push gently into the scene while clouds drifted laterally. The animation looped smoothly, and the atmospheric haze shifted slightly to suggest movement.
The feature is best understood as a creative extension rather than a video production tool. Motion types are preset and not customizable—users cannot adjust zoom speed curves, specify which elements animate, or control output duration. For a content creator who needs a quick animated hero image for a social media post or a real estate agent who wants motion on a listing page, the feature delivers clear value with minimal effort. For a video editor who needs to integrate an animated still into a larger timeline with precise timing control, the output will feel constrained and require further editing in a dedicated video application.
How the Editing Experience Unfolds Step by Step
Step 1: Uploading Without Pre-Editing Requirements
The Platform Accepts Images Without Format Restrictions
The upload interface accepts standard image formats through drag-and-drop or file browser selection. Images appear in the workspace exactly as submitted—no automatic enhancements, no pre-processing, no resolution adjustments. This means the user sees the raw starting point and can compare every subsequent edit against the untouched original.
Why Preserving the Original Matters Psychologically
Creative work is non-linear. Users try an edit, decide it is not right, and want to restart. Because the original file remains untouched in the workspace, abandoning a direction costs nothing. There is no pressure to commit to an edit, no fear of permanently altering the source image. This preservation encourages experimentation, and in my sessions, I found myself trying style transfers and creative transformations I would not have attempted if each edit overwrote the original.
Step 2: Choosing a Tool That Aligns With the Editing Intention
How Tool Categories Reduce Decision Fatigue
The tool selection presents options in plain functional language: Enhance, Generative Edit, Style Transfer, Background Removal, Object Erase, Face Swap, Photo to Video. Each name describes the outcome rather than the technical operation. A user who wants to remove a distracting element does not need to know that the underlying operation is called inpainting. They select “Object Erase” because that describes what they want to achieve. This outcome-oriented labeling reduces the cognitive distance between intention and action.
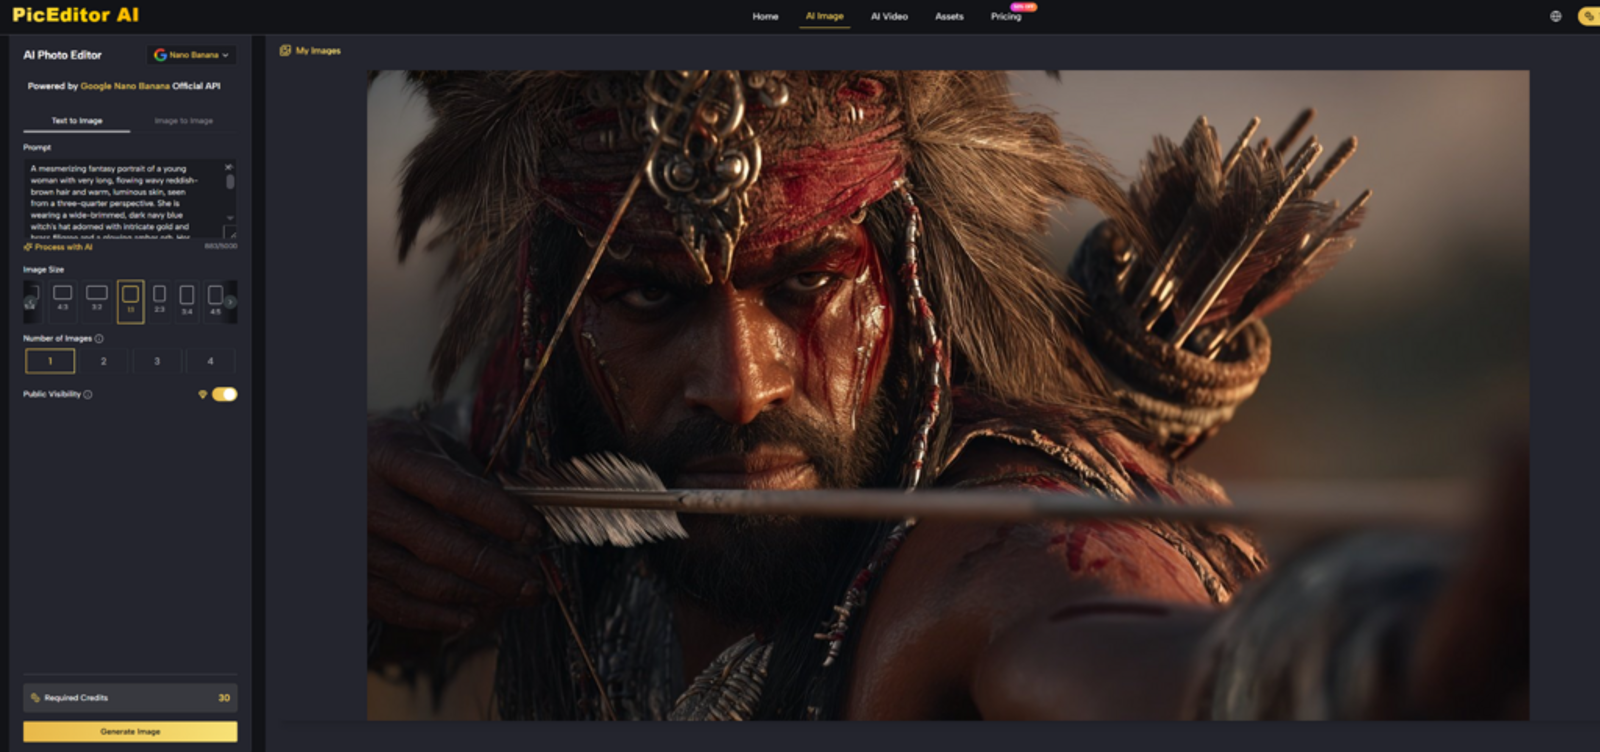
The Hidden Model Selection That Happens Automatically
Behind each tool selection, the platform routes the task to an appropriate AI engine. Nano Banana handles enhancement with photorealism emphasis. Seedream and Flux contribute to style transfer and generative editing. Veo powers the photo-to-video animation. This routing happens invisibly—the user never sees a model selector or configuration panel. The design trade-off is deliberate: it keeps the interface clean and the workflow fast, but it removes the option for technically inclined users to manually choose which engine processes their edit.
Step 3: Describing the Edit and Waiting for Interpretation
The Moment Between Typing a Prompt and Seeing the Result
After selecting a tool, a prompt field appears. The user types a description of the desired change and submits it. There is a brief processing pause—a few seconds in most cases—and then the edited image appears alongside the original. This moment of waiting is where the director analogy becomes most tangible. The user has given an instruction. The AI has interpreted it. Now the user judges whether the interpretation matched the intention.
What Happens When the First Result Misses the Mark
Not every first result is usable. When the output diverges from the intention, the user refines the prompt and regenerates. This iterative loop—describe, review, refine—is the core learning mechanism of the platform. Each round teaches the user something about how the AI interprets language. Users who pay attention to which prompts produce which outcomes develop a working intuition for the platform’s interpretative tendencies. This learning curve is linguistic rather than technical, and in my experience, it took about an hour of active editing to develop reliable instincts for prompt phrasing.
Step 4: Reviewing Results and Deciding When to Stop
The Side-by-Side Comparison That Guides Judgment
Every edited image appears next to the original in the workspace. This side-by-side layout makes it easy to assess whether the edit improved the image or introduced unwanted artifacts. The comparison is immediate and visual—there is no need to toggle between tabs or open separate viewer windows.
Knowing When to Accept a Result Versus When to Keep Refining
Simple edits often succeed on the first attempt. Complex edits on challenging images may require multiple rounds. I learned to recognize when additional regeneration was yielding diminishing returns—when the AI had reached the edge of its interpretative range for a given task and further prompt refinement would not meaningfully improve the output. At that point, accepting the best available result and moving on was more productive than chasing perfection that the current model configuration could not deliver.
Comparing the Describing Experience Across Editing Approaches
| Editing Experience | How the User Communicates Intent | Feedback Cycle | Accuracy Dependence | Best For |
| Traditional manual editor with sliders and brushes | Direct manipulation of visual parameters | Immediate visual feedback as sliders move | User skill with specific tools | Users who know exactly which technical adjustments to make |
| Single-click AI tool with no language input | Upload and click one button | One result only; no refinement loop | AI training data and algorithm quality | Quick one-off tasks with clear success criteria |
| Template-based editor with preset styles | Select from preset options | Immediate preview of preset applied | Template design quality | Users who need designed outputs with minimal decisions |
| Language-directed editor tested here | Natural language description of desired outcome | Describe, review, refine loop | Prompt specificity and user’s descriptive precision | Users who know what they want visually but not how to build it technically |
The language-directed approach occupies a unique position: it offers more creative control than single-click tools and template editors, but less technical precision than manual editors. The user trades pixel-level control for conversational speed. Whether this trade-off is favorable depends on the editing context. For quick social media content, product photo cleanup, and creative exploration, the speed advantage outweighs the precision sacrifice. For high-end commercial retouching where every pixel matters, traditional tools retain their advantage.
Realistic Constraints That Shaped the Editing Experience
Prompt quality is the single strongest predictor of output quality. The platform reduces technical barriers but introduces a linguistic dependency. Users who type “make it look better” will receive unpredictable results. Users who type “brighten the shadow area under the product while keeping the highlight on the label unchanged” will receive results closer to their intent. This is not a platform flaw—it is inherent to any language-based interface. The skill to develop is descriptive precision, and it requires practice.
Complex edge cases remain challenging across all editing categories. Semi-transparent objects, fine hair against busy backgrounds, large-object removal that overlaps with main subjects, and style transfer with precise intensity requirements all showed variable results. The platform handles these scenarios competently on average but cannot guarantee first-pass perfection. Users working on critical imagery should budget time for quality review and potential regeneration.
The editing experience is fundamentally sequential rather than batch-oriented. Each image receives individual attention through the upload-select-describe-review loop. This works well for creative exploration and small-batch editing. For high-volume workflows—catalogs with hundreds of products, event photography with thousands of images—the lack of batch automation becomes a practical constraint. The platform currently addresses consistency partially through reference image support, but does not offer true batch apply-and-process.
Fixed style intensity limits creative precision. The inability to dial style transfer effects back to a specific percentage means users cannot reliably achieve subtle artistic treatments. This matters less for casual creative exploration and more for commercial work requiring consistent style matching across a series.
What the Editing Experience Reveals About the Technology’s Maturity
After editing portraits, products, and landscapes through natural language descriptions, the conclusion that formed was not about whether AI editing is ready—it clearly is for a wide range of practical tasks—but about what kind of editor the technology enables. The platform transforms editing from a technical operation into a linguistic one. Users describe what they want. The AI handles how to achieve it. This division of labor does not replace human judgment. It redirects it from tool operation to outcome evaluation.
The AI Image Editor tested here fits a specific user profile: someone who has images to edit, knows what they want those images to look like, and values speed and accessibility over pixel-level control. It does not replace professional retouching software for users who need that control. It does replace the friction of learning complex editing tools for users who have never needed that control and may never need it. The editing experience feels like directing rather than operating—and for a growing number of creators, that distinction is exactly what makes the technology worth returning to.