Understanding how to make uv dtf stickers involves more than sending an image to a printer. The process combines digital artwork preparation, specialised printing films, UV-curable inks, and lamination to create designs that can be transferred onto suitable hard surfaces. Each stage affects the final appearance, so understanding the complete workflow is important for anyone exploring this printing method. Whether the goal is to create personalized gifts, decorative labels, or small-batch product designs, a consistent production process helps reduce wasted materials and avoid common printing defects.
Plan the Design Before Printing
The first stage is deciding what the finished transfer should look like and where it will be applied. A graphic intended for a glass jar may need different dimensions from one designed for a metal container or acrylic accessory. Create the artwork in a graphics application that supports high-resolution output and transparent backgrounds. Keep important elements within the intended design area and check that text, outlines, and small details are sufficiently clear. Very thin lines and tiny lettering can be difficult to reproduce or transfer reliably.
It is also worth considering the colour of the final surface. A design applied to clear glass may need a white ink layer to make its colours more visible. On a light-coloured surface, the same artwork may not require that additional layer.
Understand the Materials
A typical UV DTF production setup uses two specialised films, commonly called Film A and Film B.
- Film A serves as the printing film. It is designed to receive the ink layers and contains the adhesive component used in the transfer system.
- Film B is a carrier film laminated over the printed design. It helps keep the graphic together during handling and allows it to be transferred onto the target object.
The process also requires a compatible UV printer, UV-curable inks, and a laminating system. Depending on the equipment, the ink setup may include CMYK colours, white ink, and clear varnish. These layers serve different purposes: colour produces the image, white can improve opacity, and varnish can create a glossy or textured appearance. Manufacturers such as eufyMake offer UV printing equipment for creative production, but the supported films, ink combinations, and operating procedures depend on the particular machine.
Prepare the Printer and Film
Before printing, check that the printer is configured for the selected transfer materials. Load Film A according to the manufacturer’s instructions, making sure that the correct side faces the print head. Check the film for dust, creases, or damage. Poor loading or uneven material can cause alignment problems, while particles on the printing surface may affect the appearance of the design.
The printer’s settings should match the film and ink being used. These may include print resolution, ink limits, white ink configuration, and curing settings. Avoid assuming that settings suitable for one film will produce the same results with another. Following the equipment manufacturer’s recommended configuration is more reliable than adjusting settings without testing.
Print the Artwork in the Correct Layers
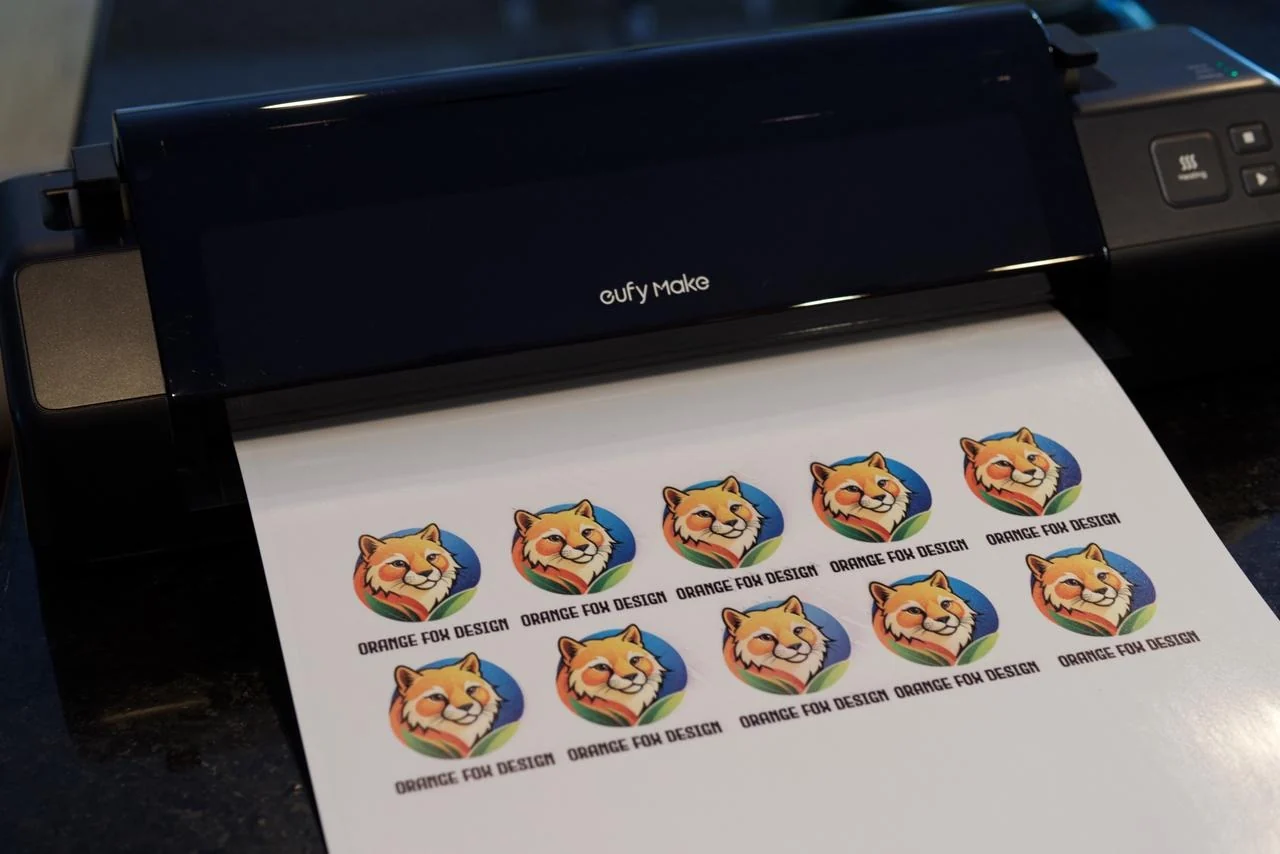
Once the design and printer are ready, send the artwork through the appropriate printing software. Review the preview carefully to confirm the position, dimensions, and order of the colour, white, and varnish layers. During printing, the machine deposits UV-curable ink onto Film A. Ultraviolet light cures the ink, turning it from a liquid into a solid layer. The printer may produce several layers in a specific sequence, depending on the desired effect and the transfer system.
White ink requires particular attention because it may be used as an underlayer to make colours appear more opaque. Varnish can add surface gloss or dimensional effects, but unnecessary layers may increase material use without improving the design. Select layers according to the intended appearance rather than using every available option by default.
Laminate the Printed Design
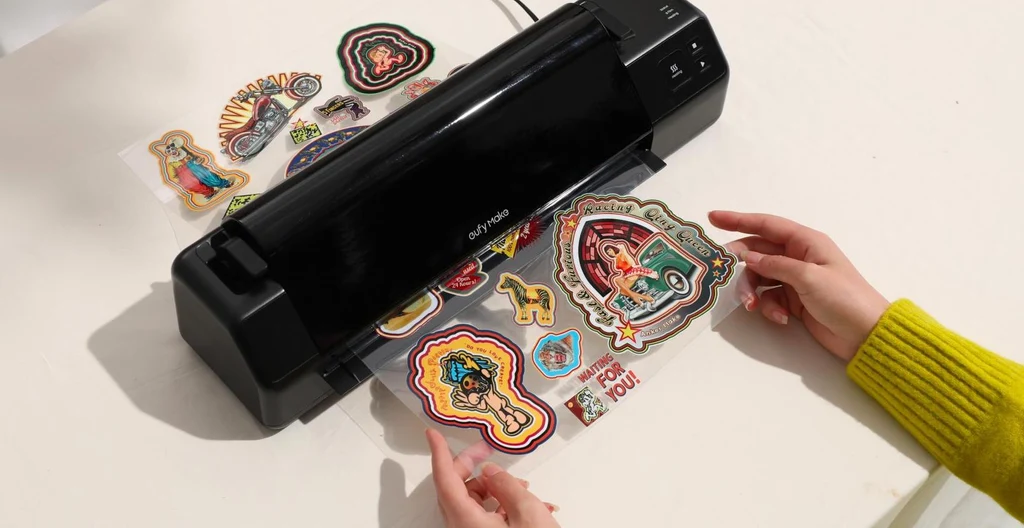
After printing, Film B is combined with Film A using a compatible laminating system. This stage creates a transfer that can be handled and applied as a complete design. The films must be aligned and joined evenly. Wrinkles, trapped air, and inconsistent pressure may lead to visible imperfections or make parts of the graphic difficult to transfer.
Follow the recommended lamination settings for the materials. Do not rush the process or substitute an unrelated film simply because it appears similar. Film compatibility is important because the adhesive and carrier must release in the intended way during application.
Cut and Inspect the Finished Transfers
Once lamination is complete, separate individual designs from the sheet. Trim around each graphic while leaving enough space for convenient handling. Inspection should happen before the transfers are packaged or used. Look for incomplete printing, colour irregularities, damaged edges, bubbles, and areas where the films have not bonded properly. Testing a sample on a suitable surface can reveal application problems that may not be visible on the sheet. For repeated production, record the materials and printer settings used for successful batches. This creates a useful reference when recreating a design or investigating differences between print runs.
Choosing Suitable Applications
UV DTF designs are commonly used on smooth, rigid surfaces such as glass, glazed ceramic, metal, acrylic, and certain hard plastics. They can decorate jars, bottles, packaging, signs, and personalised accessories. They are not a universal solution for every material. Fabric, soft silicone, porous surfaces, and heavily textured objects are generally unsuitable for standard UV DTF transfers. Adhesion and durability also depend on coatings and surface preparation, so testing is important when working with unfamiliar products.
Common Production Mistakes to Avoid
Several issues can reduce the quality of finished uv dtf stickers. Incorrect film loading may affect print alignment, while unsuitable curing settings can produce inconsistent results. Poor lamination can introduce wrinkles or air pockets, and incompatible materials may prevent the design from releasing correctly. Another common mistake is judging quality only by the printed sheet. A design may appear satisfactory before application but still perform poorly on the final object. Testing the complete process, from printing through transfer, provides a more realistic assessment.
Conclusion
Learning how to make UV DTF stickers requires attention to artwork, film selection, printer configuration, ink layering, and lamination. Each stage contributes to the finished transfer, so reliable results come from using compatible materials and following a controlled workflow. Testing designs before larger production runs also helps identify problems early and reduces unnecessary waste.
Frequently Asked Questions
1. Can UV DTF stickers be made with an ordinary inkjet printer?
No. Standard inkjet printers are not designed for UV-curable inks or the specialised film-and-lamination process. A compatible UV printing system is required.
2. Is white ink necessary for every UV DTF design?
No. White ink is useful when a design needs an opaque base or will be applied to a transparent or dark surface. Its use depends on the artwork and the colour of the object.
3. Why is lamination important in UV DTF production?
Lamination joins the printed film to the carrier film. This allows the graphic to be handled and transferred as a complete design rather than being applied as loose printed ink.
4. Can I reuse leftover UV DTF transfer film?
Unused film may be suitable for later printing if it has been stored correctly and remains clean and undamaged. Partially used sheets should be checked for dust, creases, and other defects before reuse.
5. How can I check whether a finished UV DTF transfer is good quality?
Inspect the print for clear details, consistent colour, and clean edges. Then apply a sample to a compatible surface and check whether the design transfers evenly without lifting, bubbling, or separating.