

Making leather goods looks so peaceful online. A YouTube leather bag tutorial video is often only a few minutes, edited into smooth highlights—straight cuts, evenly spaced stitching holes, clean edges, perfect hardware setting. Many leather makers inspire millions of viewers from behind screens, making leather DIY feel like a weekend impulse project. We know that feeling too.
When we started Babylon Leather, we began the same way many do today. Full excitement, full cart, full belief that leather projects would be simple because a creator made it look so. But the leather table and bill soon tell the real truth.
The manual leather DIY road always begins with more preparation than expected. Here are the honest steps we lived ourselves:
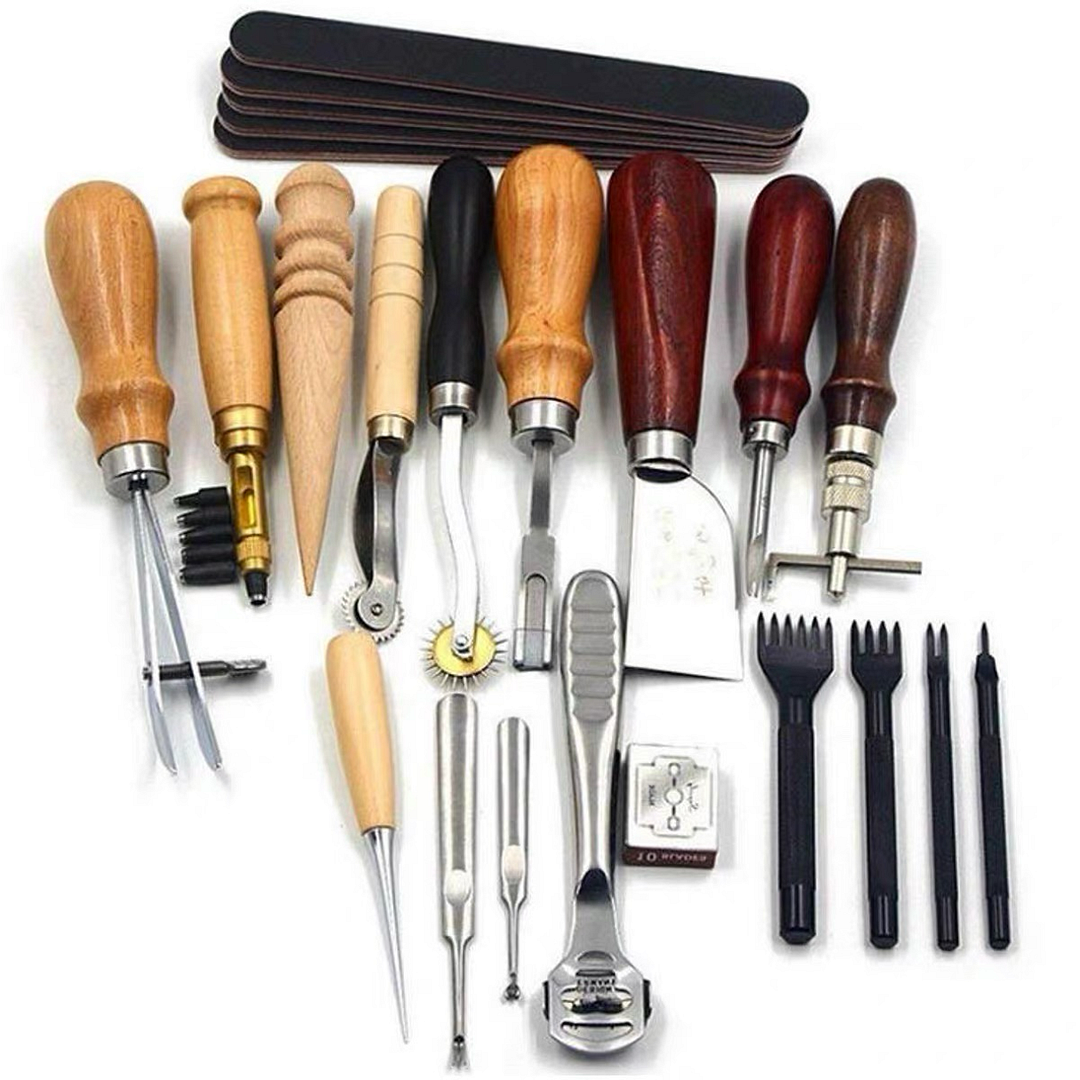
· Buying many leather tools before even opening leather pieces for the first time. A typical beginner tool setup includes a mallet, hole punch, pricking irons, skiver, cutting mat, edge beveler, burnisher, edge paint, glue, thread, washers, buckles, rivets, hardware setters, and ruler guides. Many newcomers invest 300 to 500 dollars or even more, just for entry equipment. The desk might look impressive, the bill feels intimidating.

· Choosing leather hides without knowing what full-grain or top-grain leather really needs in terms of temper, thickness, or stitching behavior. Beginners hear about leather types long before they know how to recognize them by feel or grain. Material uncertainty quietly kills belief.
· Printing patterns, tracing them onto hides and cutting leather panels carefully on a mat with a blade. A slight wobble or slanted cut leaves no place to hide in leather. Crooked cutting drains belief faster than edge paint dries.
· Finishing raw leather edges manually by sanding, sealing, oiling or burnishing over repetition until they look decent—not rough, not dusty, not practice-level. This part often consumes more patience than tooling ever did.
· Attempting hardware setting—rivets, washers, buckles, adjusters—without scratching leather or setting them crooked. Anxiety feels louder than the hammer on first tries.
Beautiful leather craft, confidence tests before craft.
We practiced quietly next to experts to learn these steps realistically, but most beginners don’t have an expert sitting next to them. They learn alone, try alone, fail again, restart 3 to 8 times on a first leather project bag, commonly wasting one or even two full leather panels before aligned stitching lines, straight cuts, or edge finishing feel possible. These restarts drain not only leather and tools, but confidence. Seventy percent of newcomers pack their tools between project two and five if the first attempt drains belief too quickly. The heartbreak is not leather—we love leather. The heartbreak is the start most beginners didn’t sign up for.
Many first bags stay unfinished.
Forums and communities quietly told us the same story. Not everyone posts their failure online, but many read others’ stories trying to decide if they can finish project one with confidence intact long enough that leather DIY doesn’t drain belief before it drains glue or washers.
That is why we built Babylon DIY Leather kits differently.
We don’t say the craft is simple—we say that starting it can be possible enough for a first project so belief stays intact long enough that a first leather bag finishes proudly by your hands, not quietly stored under your desk or regreted in tool carts.
Here is the kit’s silent advantage that flips the path to sewing-first and tool-second:

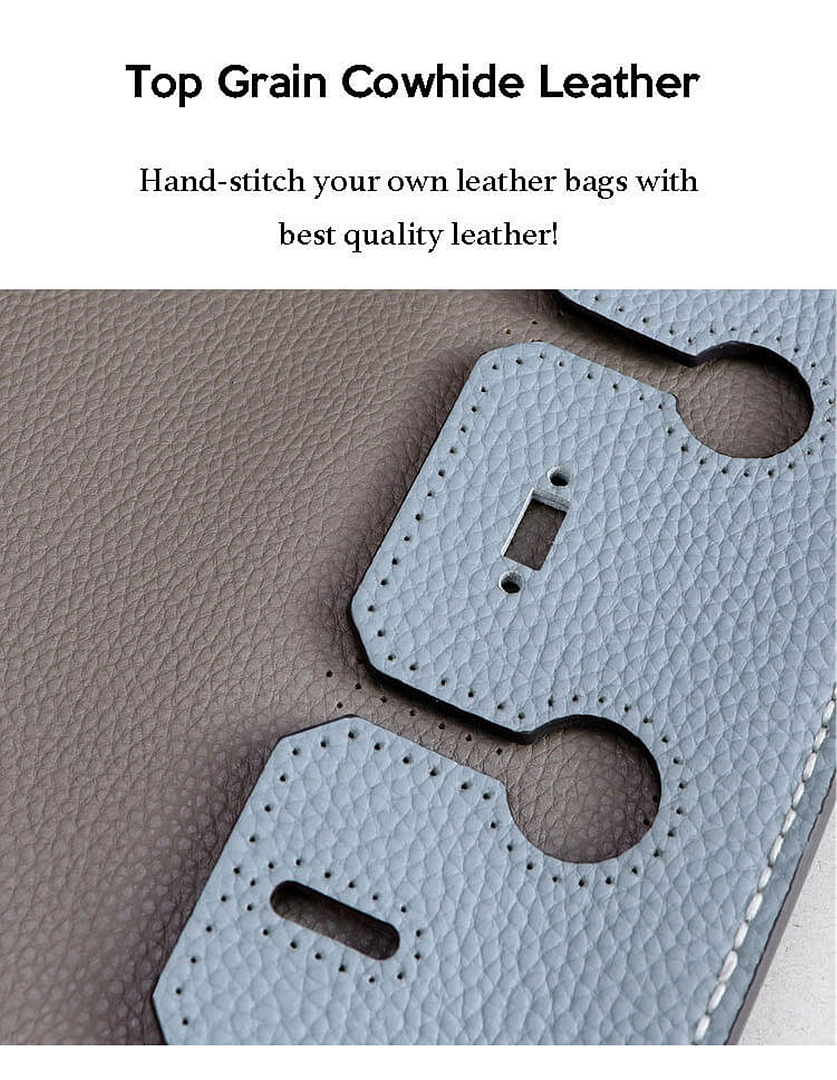
· Panels are always cut from high quality leather—full-grain leather or top-grain cowhide, with dense, natural, durable grain so your leather still feels premium when finished.
· Stitching holes are already punched with equal spacing, equal alignment, equal grain intention so your stitching lines look straight because the hole spacing stayed straight.
· Leather edges are sealed cleanly before you stitch, so makers don’t have to sand or burnish raw edges repeatedly at the start.
· The DIY leather kit includes hardware curated into one box: needles, durable threads, buckles, washers, adjusters, rivets and fittings packaged at the same time so newcomers don’t have endless guessing, shopping or tool assembly before they enjoy sewing by hand.
· Tutorials are official, detailed, visual, linear. No guesswork, only doing. You stitch by following the holes, panel by panel, buckle by buckle calmly, realistically finishing a first leather project bag in 4 to 5 hours or 5 to 6 hours depending on a newcomer’s familiarity with stitching pace. Most kit-first projects finish no leather dust drama, no tool overwhelm, no edge sanding loops draining belief before needles enjoy crafting sessions calmly.
Problem solving, confidence saved silently.
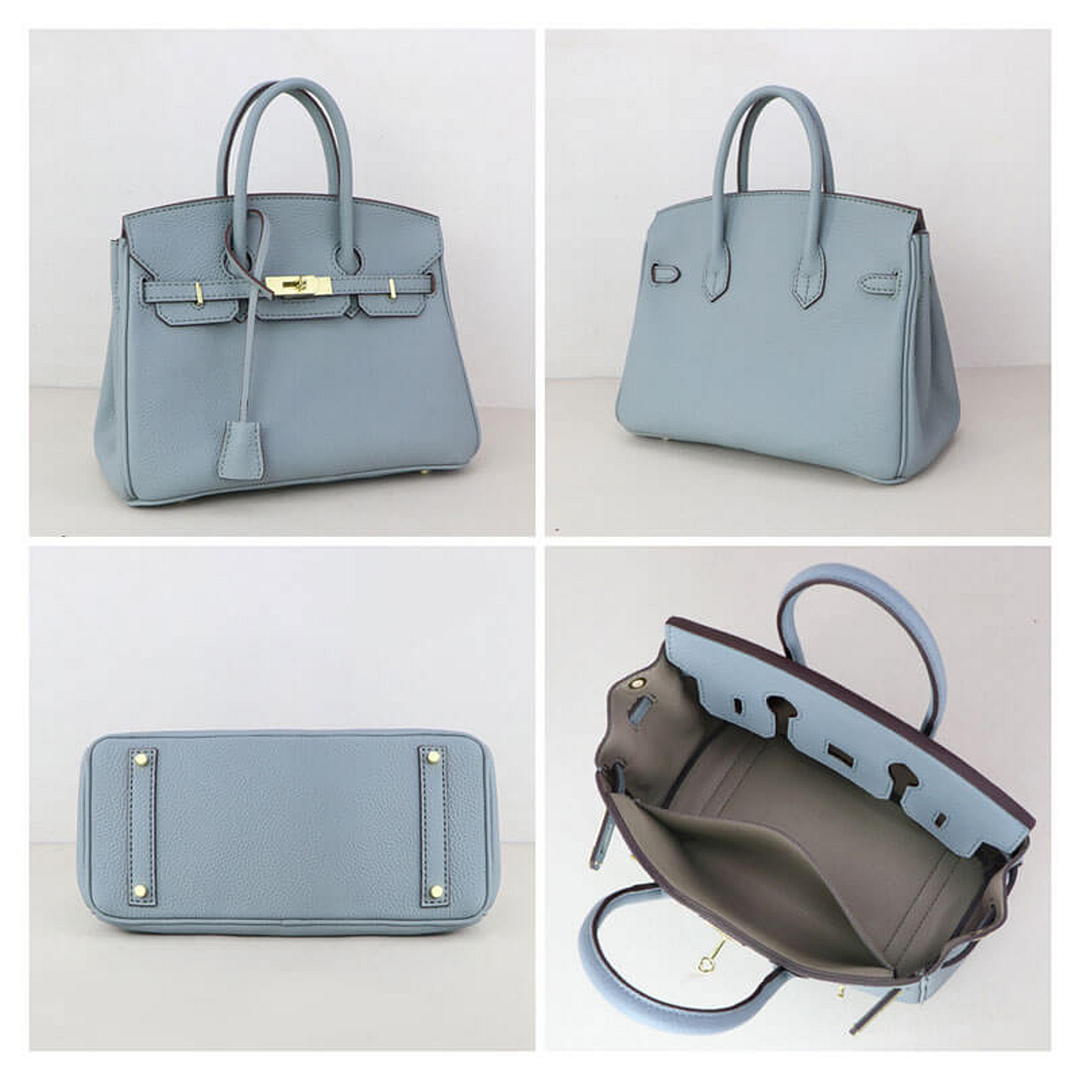
Now makers finish their first leather bag project confidently by stitching their panels by following our complete video tutorials. The real confidence behind leather craft comes from holding your finished leather project proudly, telling yourself “My first handmade leather bag is finished by my hands, quietly within one sitting”. Then the craft grows naturally over time.
We believe leather skills grow slowly with practice—each bag at a time. The start shouldn’t drain belief early enough that your first bag finishes proudly instead of adding tool regret at the desk silently.
Starting with a kit paints belief quietly. You finish it proudly by stitching.
Craft deserves kind start. Leather deserves proud finish.
Our own story, from Babylon Leather
Leather crafting should bring joy, not tool regret. Beginners deserve to start sewing first, finish their first bag proudly, feel the reward of progress, and grow leather skills naturally over time.
The happiness of making leather goods lives in the stitches, the panel-by-panel progress, the success you can hold, and the confidence that blooms after finishing, not after buying.
Leather DIY is about the joy of making. Not the heartbreak of collecting tools too soon. Start simple. Stitch calmly. Win proudly.